 Saleva
Guide 1 of 6 · Shop owner
Setting up your shop and making the first sale
From installing the app to a completed sale, in about five minutes. No account, no card, no internet needed.

Saleva asks for almost nothing to get started: a shop name. Everything else has a sensible default you can change later. There is no account to create and no card to enter, and the whole setup works with the phone in flight mode.
Install and open the app
Install Saleva from Google Play and open it. The first screen asks three things:
- Your language. English, Urdu, Hindi, Arabic or Bahasa Indonesia. You can change it later in Settings, and it changes the whole app including printed receipts.
- Your shop name. This is the only required field. It appears on the home screen, on receipts and on your online shop page if you publish one.
- What you sell. Optional. Leave it on General shop if nothing fits. Choosing a type switches on the extra fields that type needs, such as batch and expiry dates for a pharmacy, or table numbers for a restaurant. You can turn these on and off any time in Settings.
There is also a tick box to add 10 sample products. It is worth using on the first day: it gives you something to sell while you learn the app, and a card appears on the Products screen to delete them all in one tap when your own stock is in.
Not setting up a new shop? The same first screen has Join a shop for staff, I deliver for riders, and I'm a customer for shoppers. Those are covered in the later guides.
Tap Start selling and you are on the home screen.
Reading the home screen
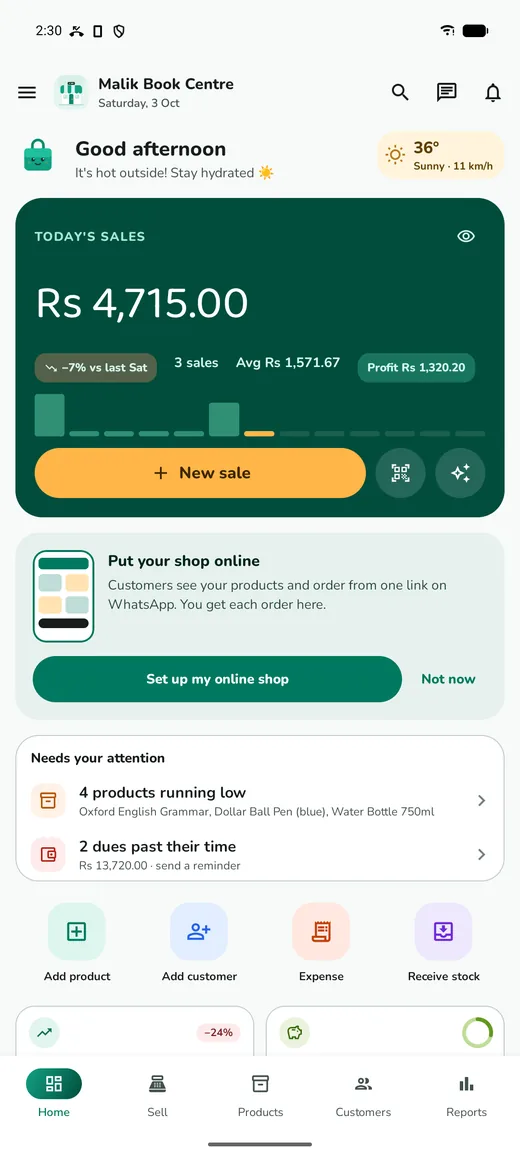
The card at the top is your day: what you have taken, the profit in it, how many sales, and the average sale. It updates as you sell, with no refresh button to press.
Under it, Needs attention is the part worth glancing at each morning. It only appears when something wants doing, such as stock that has fallen below its minimum, or changes waiting to sync. If there is nothing to say, it stays out of your way.
The six tabs along the bottom are the parts of the app you use daily: Home, Sell, Stock, Customers, Inventory and Reports. Everything else lives in the side menu behind the button at the top left.
Make the first sale
Tap Sell in the bottom bar.
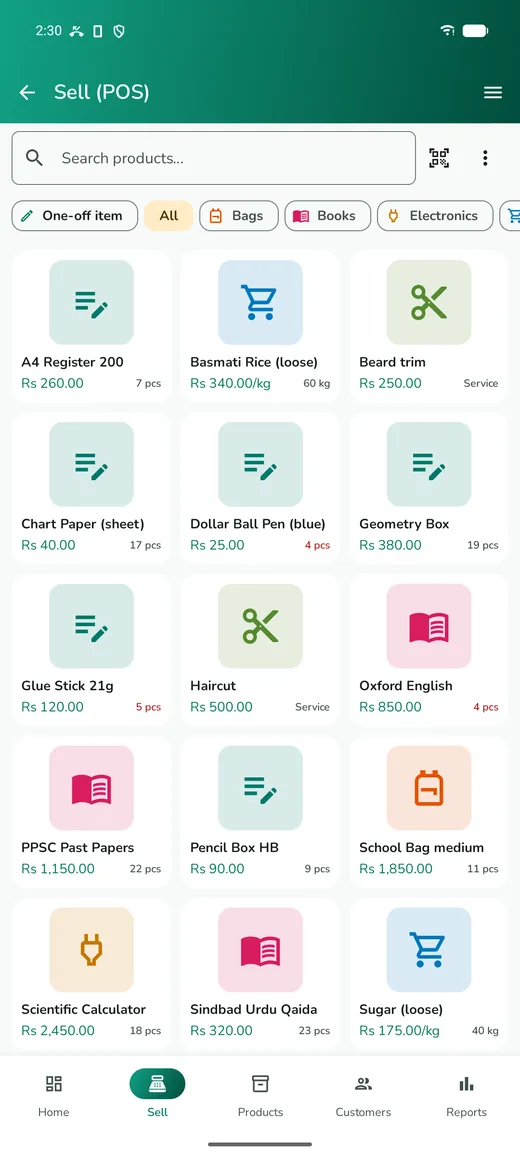
Three ways to add a product, use whichever is fastest for the item in your hand:
- Tap it in the grid. Tap again to add a second one.
- Search by name, and the list narrows as you type.
- Scan the barcode with the camera button. If the code is not in your catalogue yet, Saleva offers to create the product on the spot rather than making you stop and leave the sale.
When the basket is right, tap the total to go to checkout, choose how the customer paid, and confirm. The sale is recorded, the stock comes off, and you are back on an empty screen ready for the next customer.
That is the whole loop, and it works with no connection at all.
A receipt, if you want one
At checkout you can print to a Bluetooth thermal printer, share the bill on WhatsApp, or save it as a PDF. Nothing forces you to give a receipt, but it is the cheapest way to end arguments about what was bought and for how much.
Printer setup lives in Settings → Receipts & printer, and you only have to do it once.
Set the things you skipped
Open the side menu and go to Settings.
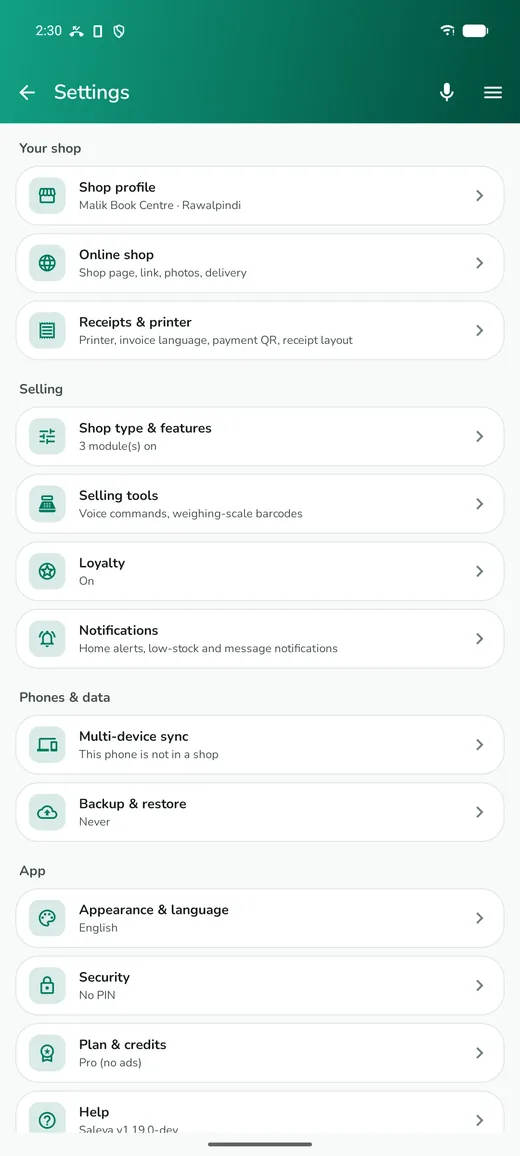
Worth doing in the first week, in this order:
- Shop profile — your phone number and address. These appear on receipts and on your shop page.
- Backup & restore — switch on the daily backup. It keeps the last seven copies on this phone, and you can also back up to your own Google Drive. Do this before you have data worth losing.
- Shop type & features — switch on only what your shop needs. Every module you turn on adds fields and screens; every one you leave off keeps the app simple.
- Appearance & language — pick a colour if you like. This is cosmetic, but shopkeepers find it easier to work with a screen they chose.
What is free and what is not
Everything on this page is free and always will be: selling, stock, customers, dues, expenses, the everyday reports, printing and backups. None of it needs the internet, except a backup to your own Drive.
A few advanced tools need Saleva Pro, or a day's unlock with credits from a short ad: deeper analytics and insights, forecasting, the AI assistant, image tools, recipes, several batches of one product, restaurant extras, customer-specific prices, staff shifts and commission, weekly automatic reminders, supplier ledger reports and premium themes. The app marks each of them with a Pro card, so nothing stops working without warning.
The parts that need a server are optional: syncing a second phone, your public shop page, customer orders and chat. Those run on credits, which you earn by watching a short ad, or on a subscription if you would rather not see ads. There is a guide on that at the end of this series.
Questions
Do I need an account or a phone number to start?
No. There is no sign-up. The app creates an anonymous identity only if you switch on a cloud feature later.
Will I lose everything if I lose my phone?
Only if you have no backup, which is why the backup step is third on the list above. With a Google Drive backup you install Saleva on the new phone, choose Restore from backup, and sign in with the same Google account.
Can I change the shop type after setup?
Yes, at any time, in Settings → Shop type & features. Turning a module off hides its fields; it does not delete anything you already recorded.
Does the app work in Urdu?
Yes, along with Hindi, Arabic and Bahasa Indonesia. The interface, the voice commands and the printed receipts all follow the language you pick.
Get Saleva
Free on Android. Selling, stock, customers and reports all work with no internet at all.